How to Create More Dynamic Images Using Local Adjustments
A powerful post-processing technique I use for almost every photo is adjusting my settings locally. I use this technique to bring emphasis to key areas of a photo that I want my viewer to focus on. I am using Adobe’s Lightroom Adjustment Brush and Adobe’s Photoshop Dodging and Burning tools to accomplish this.
I generally shoot in RAW so images right out of the camera are typically flat and dull. I first make general adjustments to my photos such as correcting for white balance and overall exposure. Then I will start making the important local adjustments. When using Lightroom’s Adjustment brush I can make the following local adjustments: Exposure, Brightness, Contrast, Saturation, Clarity, Sharpness and Color. Depending on the photo I may use all of these or only one. I use the Exposure, Clarity and Contrast adjustments most frequently. In Photoshop the only local adjustments I make are dodging and burning. These techniques can also be made with other file types, but I prefer uncompressed RAW files.
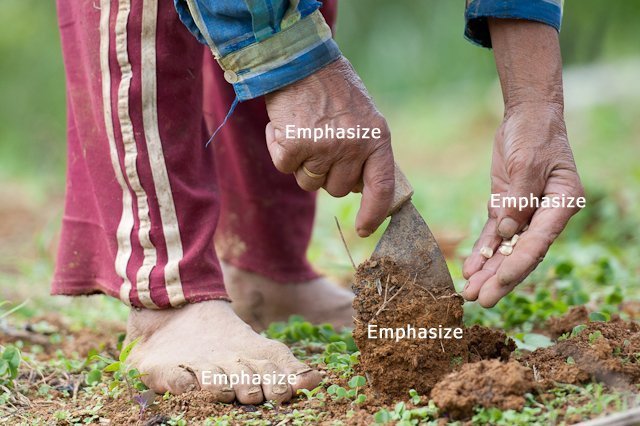
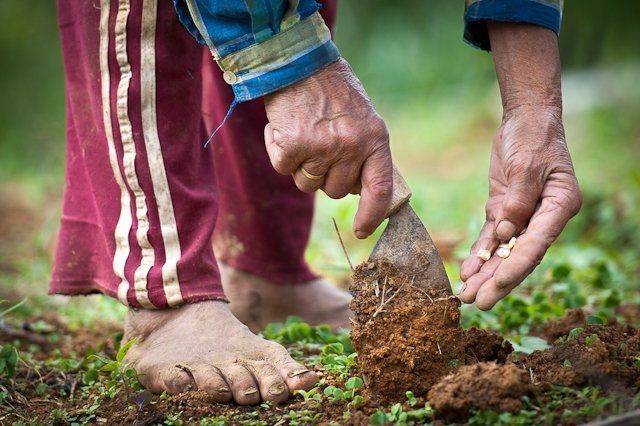
In this photo of a women planting corn I wanted to emphasize her hands, feet and the tool she is using to dig. Those are the key elements I wanted my viewer to take away from this photo and what I believe conveys the story in this image.
I used Lightroom’s adjustment brush to add some clarity and contrast to her hands, feet and digging tool. I then darkened certain non-key elements of the photo by lower the exposure, again with Lightroom’s adjustment brush (mainly the background). I also lowered the exposure of her right foot because I wanted to see more detail and it was slightly overexposed. After I was finished in Lightroom I brought the photo into Photoshop. There I slightly dodged her hands, feet and digging tool while darkening the background some more with the burn tool.
My technique for using the Adjustment Brush in Lightroom.
1. Zoom in on the photo or change the size of the brush so you can make more detailed adjustments.
2. Create as many adjustments as you need to get the look you want. Typically I make between 1-10 adjustments and reach as many as 20 on some images.
3. I am conservative when using this tool so as not to make my photos look unbelievable or fake. I only want to bring back the original look and feel of what I saw.
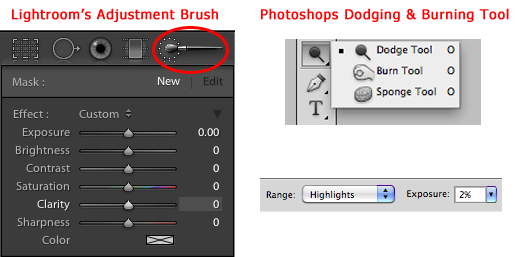
My technique for dodging and burning in Photoshop.
1. When Dodging I set my Range to Highlights and Exposure to 2-5%. I only want to dodge the photos highlights.
2. When Burning I set my Range to Shadows and Exposure to 2-5%. I only want to burn the photos shadows.
3. I only use these tools to bring a slight emphasis to key areas of the photo.
4. Set your Photoshop history preferences to remember more or your adjustments. This way you can undo something you don’t like much easier.
Photoshop–>Preferences–>Performance–>History & Cache–>History States
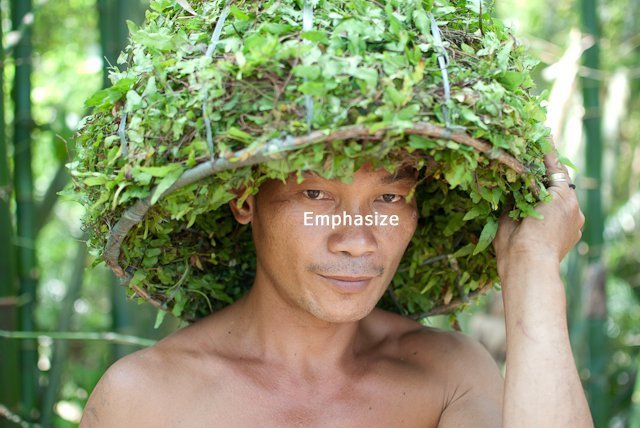
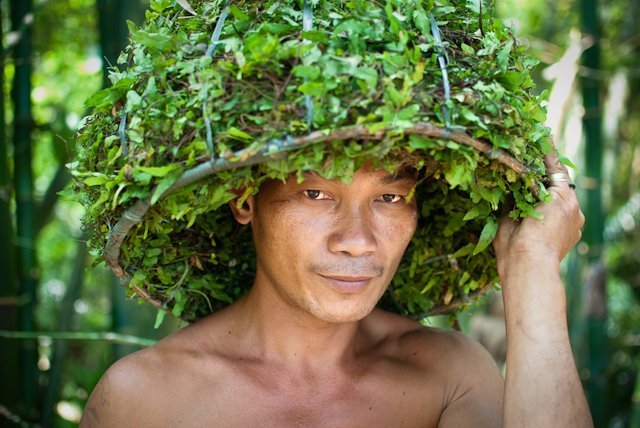
In this photo and in most portraits I want to emphasize the subjects eyes and other facial features. The subjects eyes in a portrait are normally the most important element.
In Lightroom, I first made two general adjustments to this photo. I warmed up the white balance and slightly brought the overall exposure down. Then I began to make local adjustments to highlight the eyes and other facial features. I used Lightroom’s Adjustment Brush to add clarity, contrast and exposure to the eyes. I also added exposure and clarity to the cheeks. I then darkened the background and most of the headdress by lowering the exposure with the Adjustment Brush.
I didn’t want the headdress to overpower and take away from the mans face, so I made sure it was slightly darker. I then brought the photo into Photoshop to dodge the same parts of the face. I also burned the headdress and background making those elements a little darker.
There is no magic bullet using these techniques because every photo will be different. Before starting with your local adjustments it’s important to first recognize what parts of the photo you would like to highlight. If you don’t have a plan as to what it is you want to emphasize you may find yourself spending more time editing than you would like.
Comments are closed.
email: [email protected] |
© 2026 Jacob Maentz