2 Essential Corrections to Know When Post Processing Underwater Photos
With the market today providing an assortment of underwater casing options, more and more of us are beginning to bring our cameras under the surface to explore this fascinating world. From the more affordable soft casings for our DSLRs to the simple waterproof coverings for our smart phones, underwater photography is becoming more and more popular among photographers.
Often times for those just starting out with underwater photography, our pictures don’t always come out exactly the way we remember seeing it. There are likely a few reasons for this, but this article will focus on two simple techniques we can use during post-processing to help improve the quality of our underwater photos.
1. Correcting for Color: The biggest challenge we often come across with our underwater photos is the loss of key colors in the image. Water absorbs different wavelengths of light, so even at shallow depths red starts to be absorbed, followed by orange and yellow. With these colors absent our photos can look flat and uninviting. Many expensive underwater housings will attach strobes to help bring back in these colors, however, with simple casings we must rely on ambient light and tend to lose some of the photograph’s color. In post-processing we can help bring back these lost colors and correct our white balance.
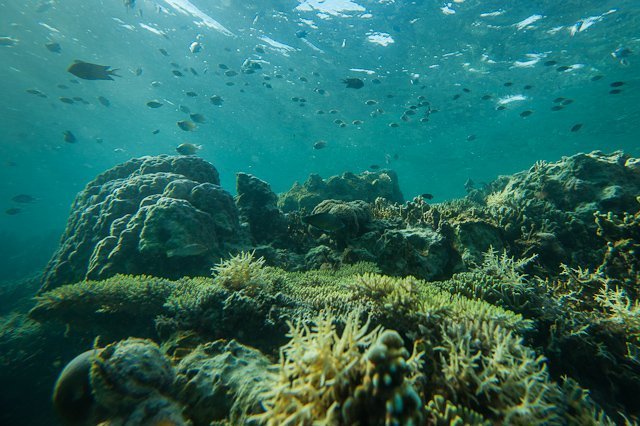
You can see in the original RAW file above that there is an orange cast across the photo. This is because of the slightly warm white balance (5500K) the automatic setting gave when shooting. Most underwater photos will show the best blues with a white balance of around 4500K which you can set manually. If you are shooting in RAW you can easily adjust your white balance in post-processing. Likewise, the photo above lost some of the yellows and reds inside the coral reef. Bringing back these colors will make the image more vibrant.
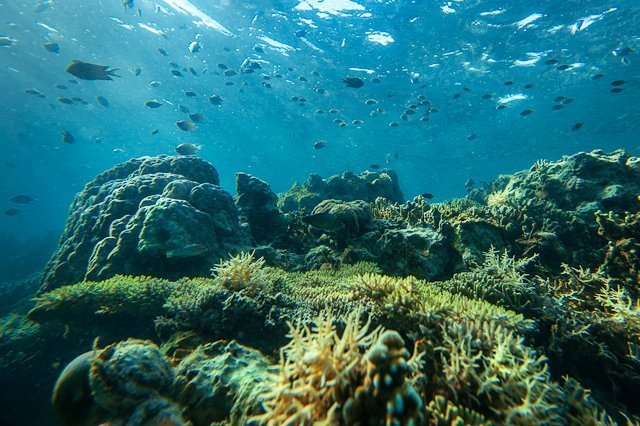
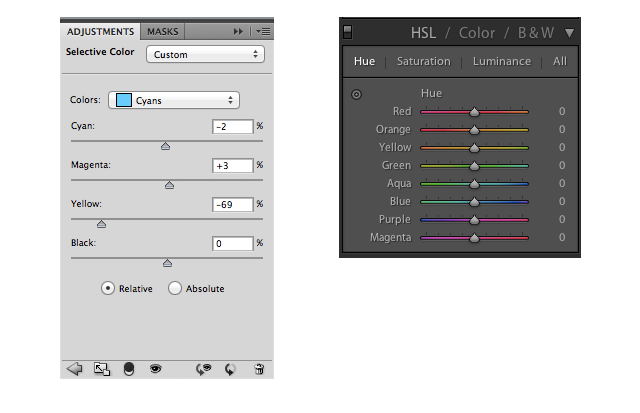
First, correct for the image’s white balance using the temperature slider in Lightroom. This photo’s white balance was brought from 5500K down to 4500K. Second, use the Selective Color tool in Photoshop or the HSL/Color/B&W panel under the development module in Lightroom to focus in on key colors of your image. These two selective tools are very powerful and allow you to precisely adjust each color. There is really no road map for doing this because each photo will vary. It’s best to get familiar with these tools and see what works best for bringing back the lost colors to your image. Keep in mind that the Selective Color tool in Photoshop is a little more powerful and specific than the HSL/Color/B&W panel in Lightroom. In the photo above adjusting the cyan colors within Photoshops Selective Color tool gave this image the best result.
2. Correcting for Contrast: Water has a tendency to take the contrast out of photos, making this correction an important step in our post-processing. Contrast is the difference between light and dark tones and water tends to lighten dark tones – decreasing a photo’s contrast.
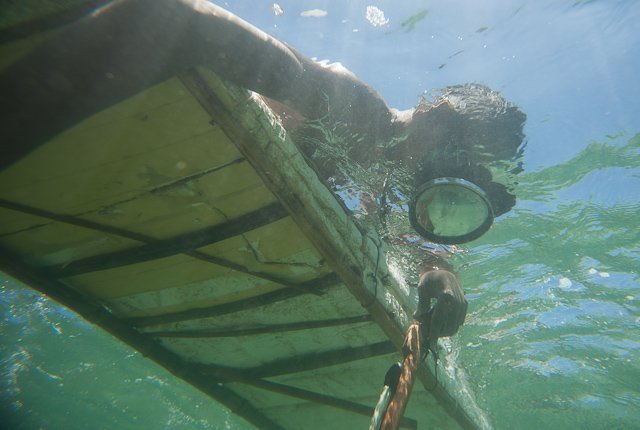
In the original RAW file above you can see that the image looks flat. A quick look at the histogram will reveal that the light and dark tones need to be increased. A quick levels adjustment within Photoshop would be an easy way to add contrast to this image, but other tools such as the contrast slider in Lightroom will also work.
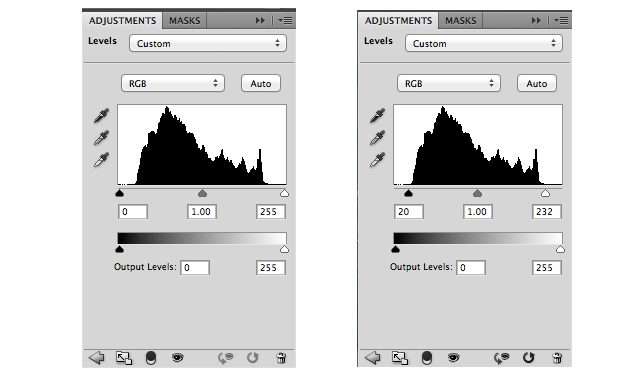
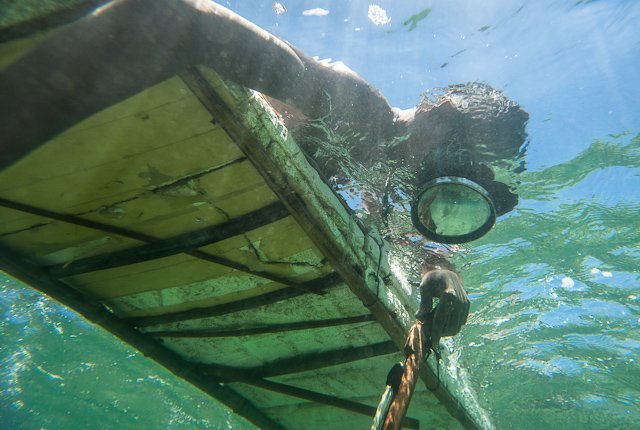
The edited image below with added contrast makes for a more dynamic photo. A simple levels adjustment was done to increase this photo’s contrast.
email: [email protected] |
© 2026 Jacob Maentz
